{Charmed Event} A Rubber Ducky Baby Shower!
This past weekend, my family held a baby shower for my older sister, Jenny. My mom, and my other sister, Steph, and I all helped to plan the décor/favors for the shower. Jenny wanted lots and lots of rubber ducks, so that’s what we gave her! Everyone loved how it came together, so I thought this would be a great time to share some photos from the shower, and some of our inspiration with you!
{The Invitations}
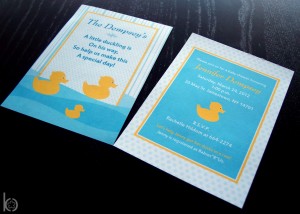
For the invitations, I really wanted to go with a “cute but elegant” look, so I custom designed these invitations for Jenny.
{The Favors}
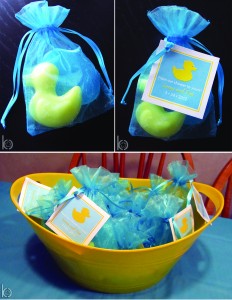
A few months before the shower I was looking up favor ideas for a rubber duck themed shower, and came across some suggestions like bubble bath, and bath soap. I thought these were great ideas to tie in our theme to the favors! My sister, Steph, took it one step further and created two different bath soaps: a yellow duck, and a turquoise bar soap to match the colors of the shower. She even scented them like baby powder! We used favor bags similar (only larger) to the ones found here, and I designed the tags to match the invitations. The turqouise favor bags and bar soap behind the yellow duck helped to give the duck the appearance of being in the water. We found the small, yellow container (I thought it look similar to a tub) at the Dollar Store, and it worked perfectly to hold the favor bags!
{The Food}
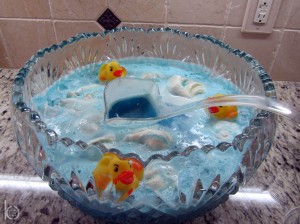
We added a few fun details to the buffet to ensure the food matched the theme of the event. My aunt created the punch by mixing Blue Hawaiian Punch, lemon-lime soda, and vanilla ice cream. My mom found the small ducks that we washed and allowed to float around the punch bowl.
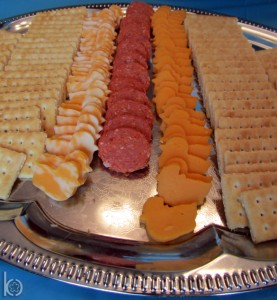
My mom found a small cookie cutter shaped like a duck to cut out all the cheese. A fun way to eat cheese and crackers!
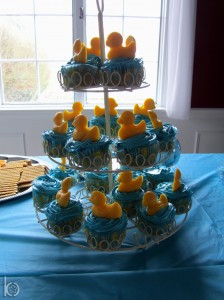
The cupcakes were baked by my mom in duck liners (found at Hobby Lobby), and my sister, Steph, and I frosted them to look like waves. My mom bought the yellow chocolate melts and melted them down in the microwave and put them into a duck mold, then placed them in the fridge to harden. The ducks were placed on top of the frosted cupcakes and put on a cupcake stand.
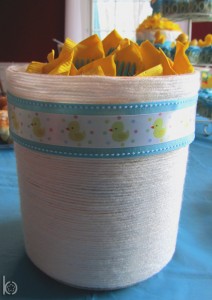
Rather than just putting the silverware out for people to take, I wanted it to have some style so I decorated an empty, plastic pretzel rod container to match the theme. {We used turquoise, plastic silverware wrapped with a yellow napkin. You can’t see it in the picture but I made napkin rings by wrapping ribbon around the rolled napkin and attached the ribbon to itself using a glue dot. I used two different ribbons, a turquoise polka dot, and a duck pattern, and alternated which ribbon I used on for each napkin ring.}
This container had a lot of grooves and places where the plastic stuck out at the top, so this is how I wrapped it:
What you’ll need:
Yarn
Plain Ribbon
Patterned Ribbon (smaller width than the plain ribbon)
Mod Podge
Foam Brush
Hot Glue
- Starting about ¾ the way up the container (where the bottom of the ribbon will be), apply a layer of Mod Podge with your foam brush about a 1/2 inch wide all the way around the container (don’t do too much at a time or it will dry before you get there).
- Wrap the yarn over the Mod Podge, pressing down and squeezing the rows of yarn together as you go.
- Once all the glue has been covered, apply another 1/2 inch wide strip of glue and continue applying the yarn over the glue.
- Continue this process until you get to the bottom of the jar, and then cut off the ribbon and tuck the end under a previous row so you can’t see it. (Try to be consistent about where you start and end the yarn on the container so you can keep the ends on the back)
- Using your thicker, plain ribbon, measure the jar and cut the ribbon so you have about an inch more than you’ll need.
- Remembering where the back of your jar is, put a dab of hot glue on the container, and press the end of the ribbon down until it dries.
- Wrap the ribbon around the jar and place another dab of hot glue on the ribbon that is already attached to the jar.
- Press down the other end of the ribbon until it dries. (You may need to lift the ribbon in a few places around the jar and add some extra hot glue so it doesn’t sag)
- Repeat this process with your thinner more decorative ribbon, centering it on the plain ribbon.
- Since the top of my jar had so many grooves, I had to apply the ribbon differently from how I did the bottom, wrapping and placing a dab of hot glue every few inches until the top was covered. If you have a more normal container that is flat, you can apply your yarn to the top in the same way you did the bottom.
{The Games}
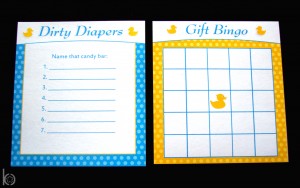
Two of the games we played at the shower required guests to write, so I designed custom duck cards to match the rest of the paper products at the event.
P.S. If you’ve never played the “Dirty Diaper” Game (aka “Name That Candy Bar”), you have to consider planning it for your next baby shower. It’s a great, fun {and somewhat disgusting} baby shower game. :)
{The Décor}
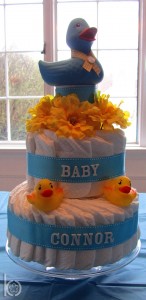
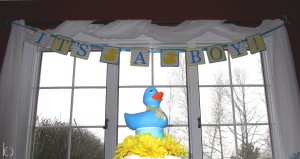
After debating about the centerpiece for awhile, my mom came across the idea of doing a diaper cake. Like everything else at the shower, we wanted to keep it cute but elegant at the same time, so we decided to match the theme of the shower, rather than using lots of pacifiers, rattles, etc. My mom and I created the diaper cake together, and we were so thrilled with how it turned out!
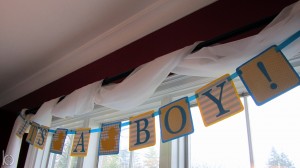
I made the banner by creating a template for all the shapes and letters on my computer, printing and cutting out each template, tracing them onto scrapbook paper, and cutting them out. It took a long time to do all that cutting, but it was definitely worth it in the end!
Have an event you’d like us to feature on our blog? Feel free to submit photos and information to info@cherryblossomcharm.com :)

