The Charmed Home: Christmas Edition + FREE GIFT TAGS

Happy Tuesday, readers!

A few months ago I announced that my husband and I just purchased our first home, and that I’d be sharing some of our projects with you. Well, our busy lives have taken over and I have failed to do that… :( However, today I have some holiday cheer to spread with some photos of our Christmas decor + there may be some freebies at the end of this post. ;)

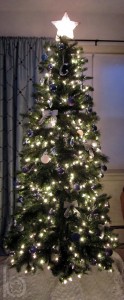
I can’t tell you how excited I was to decorate for Christmas this year. I’ve never had a full size tree of my own to decorate (being in small apartments for many years), so this year the hubby and I couldn’t wait to go out and get one! Everything you see in our tree photo (tree included) is from K-Mart  – they had some awesome stuff this year! {Ok, I lied – the “C” ornament was a gift at my bridal shower, but other than that, all K-Mart. :) }

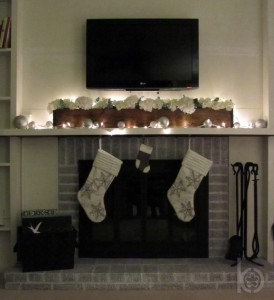
For the mantle – our stockings are all from Target, and I got a 50 pack of silver bulbs from Ikea for $10 to use on the mantle, and in vases (they’re definitely a lesser quality than our tree bulbs – but are great for other decor!).


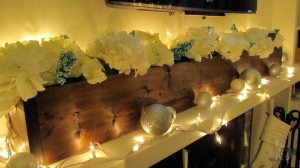
I am in love with our mantle! My hubby built me this box a few months back  to fill out our mantle and cover the ugly TV cords (based on one I found on Pinterest). I change out the hydrangeas seasonally, so for winter I went with all white, and then put in some blue arrangements that I found at Michael’s.

*Sidenote – please ignore our fireplace! When we moved in it was a bright red brick with a brass insert. The hubby and I spray painted the insert black (which is definitely an improvement) and tried to whitewash the brick (another Pinterest project ;) ), and I’m not too fond of the results… We are having someone install some stacked stone all the way up the wall, behind the TV, sometime after Christmas. I’ll have to post some after pics. :)

I just love this when it’s all lit up at night. :)

Now, my Christmas gift to all my lovely readers… FREE GIFT TAGS! This is my way of saying “thank you” to all of my wonderful customers that have helped to make my first year in business so successful. :)
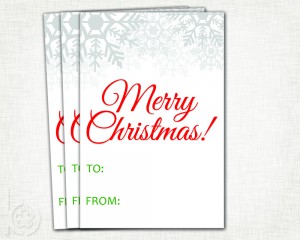
You can download the PDF of these tags to use here. I also recommend printing them on a heavier card stock paper, rather than regular printer paper.

Feel free to share the link to this post by using this link:

The Charmed Home: Christmas Edition + FREE GIFT TAGS

Merry Christmas, Everyone!


TERMS OF USE
You may use this digital file for PERSONAL USE ONLY. This file may not be mass produced, shared, forwarded or used for commercial purposes. Doing so is strictly prohibited.  These gift tags are complimentary, so please feel free to share the following link:

http://www.cherryblossomcharm.com/2012/12/11/the-charmed-home-christmas-edition-free-gift-tags/

If you’d like to share this on your own blog, please contact me at info@cherryblossomcharm.com, or by using my contact page, prior to sharing.

You may not resell this file or the finished product. You may not use or extract my original graphics to redesign or recreate items for commercial useage or sale. Cherry Blossom Charm maintains all copyright over this design. Please respect my work and exercise proper usage. Thank you.

A Damask Birthday Party!

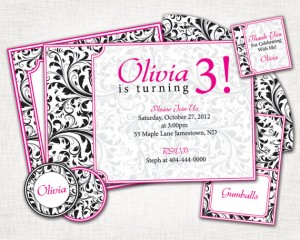
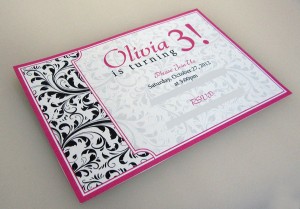
Last weekend was my beautiful niece’s 3rd Birthday Party! My sister purchased an adorable damask and pink dress from Laken and Lila, and asked me to create a party pack to match the dress. What a cute idea!

Here is my niece in her birthday dress:

See, I told you she’s beautiful! ;)

And here’s a photo of her matching party pack:

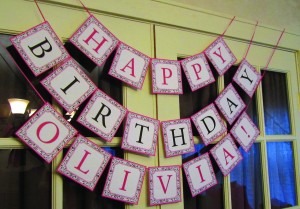
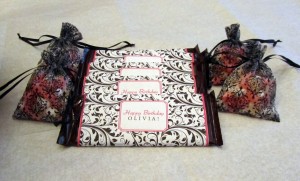
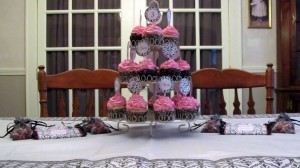
For the party, my sister chose the invitation, cupcake toppers, banner, and candy bar wrappers. Here are some photos from Olivia’s party, held at my parent’s house:


{The damask favor bags are from Michael’s, and the damask table cloth is from K Mart}

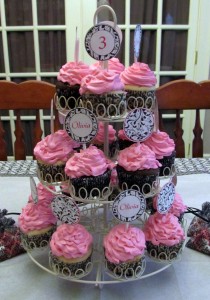
My sister made all these gorgeous cupcakes herself!

What an awesome idea to match the dress to the party, I’m loving how perfectly coordinated this event was!

The Charmed Home: Bedroom Wall Art

A few weeks ago, I shared the exciting news that my husband and I just purchased our first home. We closed last Thursday and got everything moved in and unpacked over the weekend! I can’t believe how quickly we got it all done! Now comes the fun part…decorating! :)

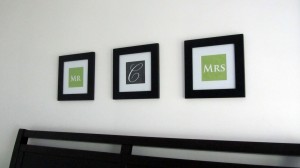
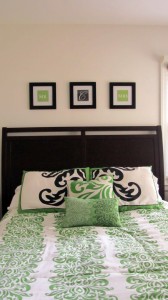
My husband and I registered for this amazing green and black duvet cover when we were getting married, and ever since we received it I have struggled with finding wall art that goes with the look I want in our bedroom. We bought these 3 black 5″ x 5″ frames a year ago (see the exact frames here), and they’ve sat empty in a closet all that time… When we moved into our house, I knew I had to design or find something to put in them! Finally, I came up with this idea…

Now I can claim my side of the bed! I love things that are simple, yet elegant at the same time so I thought these were the perfect way to add a little color to our blank walls! I also put a subtle damask print behind the text to tie in the pattern in the duvet.

I really didn’t want any massive artwork above our bed because our headboard is so tall, so I think these frames worked perfectly!

What do you think?

Friday Find: Hanging Origami Lamp

Happy Friday Everyone! The past few Friday Finds I’ve done have been more traditional and/or vintage, so I thought it was time to share something different!

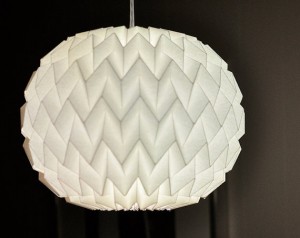
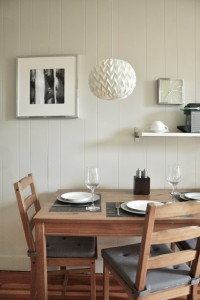
This week’s find is an amazing and modern LED lamp by tyART. Justine folds the paper to create this unique pattern throughout the lamp – isn’t that awesome?! I love that she uses an LED light, which is way more energy efficient AND environmentally friendly. I also love that you can change the color of the light, depending on your room (or mood). :)

I had to share two images of this lamp because it is so versatile! It looks so modern lit up, but then it blends so nicely with the slightly more traditional decor in the second picture.


(photo credit goes to Justine from tyART)

From Justine’s Listing:

“The Bubble LED lamp is a wonderful and modern way to decorate and add color to the part of your home that could use a little more pop. It can also be a cool and fun centerpiece for a wedding, party, or any special events”

Read more here.

Justine has a variety of lamps in her shop, so be sure to check it out!

Friday Find: Vintage Indian Brass Vase

This week’s Friday Find comes from a GORGEOUS shop called Bluebells and Bunting. Alexandra has an amazing collection of all things home decor.

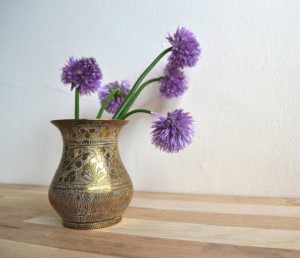
When looking for this week’s find, I immediately fell in love with this stunning Vintage Indian Brass Vase. The detail is just incredible, and it is such a unique vintage find. This vase is sure to be a conversation starter in your home since its origin is so unique. If you’re considering purchasing this vase, you better do it fast because I don’t think it will last long!

(photo credit goes to Alexandra from Bluebells and Bunting)

From Alexandra’s Listing:

his vintage Indian brass vase is hand etched with a traditional floral pattern.
Measures 3.5″ in height and 9″ circumference at it’s widest.

There are no hallmarks and the piece is not signed. The exact origin is unknown, it perhaps once adorned the souks of the Middle East, rich with incense and spices.

It is in excellent condition for it’s age, with no obvious signs of wear or tarnishing on it’s exteria.

Seriously, you NEED to check out Alexandra’s shop because she has some of the loveliest items I’ve seen. Thanks, Alexandra, for allowing me to feature you this week!


Friday Find: Doily Art

This week’s Friday Find comes from an adorable shop called JoliesCutesies. The shop owner, Norma, has some amazing vintage items, some beautiful doily hoop art, and much more!

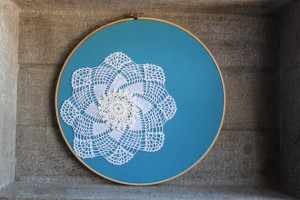
My favorite item in her shop was this beautiful blue Shabby Chic Doily Art. I love the blue that she chose for this item (one of my FAVORITE colors), and the contrast of the white doily against the blue is so modern and fun. I remember having a few doilies in my house growing up, and always thought of them as part of a more “country” decor, but I love that they’re coming back in such a modern and unique way. Definitely not the doilies I saw growing up!

(photo credit goes to Norma from JoliesCutesies)

From Norma’s Listing:

“This beautiful embroidery hoop doily art would make a perfect gift or home decoration for your home or that special someone.

Doilys to me remind me of my mother growing up I would see them all over the house.I would see them on the end tables, sofas, kitchen any were. Not only did my mother love them but all of my aunts had them also. Its a culture thing that everyone makes them as a hobby or pass time. Well then I said to my self why not brighten this beautiful creations I grow up seeing everywhere. :)”

Love this item, but not sure about the color? Norma has these in more of beautiful colors! Check them out here.

Thank you, Norma, for allowing me to feature you on my blog! :)

Friday Find: Casserole Carrier

I want to start off by apologizing for my lack of blog posts! I’ve been so busy designing new products and getting my Etsy Shop in “tip-top” shape, that I never have the time to blog!

The last few weeks I have done a “Friday Find” on my Facebook page, but I’ve decided to move it over to my blog so I can talk more about the products I find. :)

This week’s find is from an adorable shop called Moonlight 55. They have some beautiful kitchen items, so please go check out their shop and take a look around!

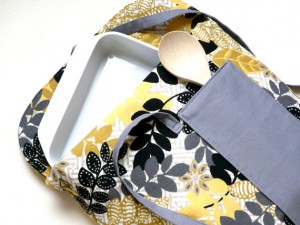
The product that really caught my eye was their casserole carrier in this fun print:

(image credit goes to Terry from Moonlight 55)

From Terry’s Listing:

“Insulated casserole carrier will get everyone’s attention when you show up at the party carrying your favorite dish. More importantly, the insulation reflects back heat or cold to its source, which eliminates the need to store your dish in a warm oven or refrigerator until it is time to eat.

*Insulated casserole carrier is made with quality Cotton Duck fabric.

*Envelope-style design totally encloses the dish. It will accommodate up to an 11” x 14” size dish. Flexibility of the envelope design allows for a round shaped dish as well, eliminating the need to have two carriers to accommodate various shaped dishes.

*Color coordinated fabric is used for the tie and serving utensil pocket. The 9 x 13 inch baking dish and spoon shown in the photo are not included.

*Perfect for anyone who cooks and attends potlucks, church socials, supper clubs, family reunions, BBQs, or tailgate parties. Also a great gift idea for a coworker, hostess, wedding, birthday, or just to say “thank you.”

I love that it’s both stylish and functional. It’s a great way to keep your food warm until it’s time to eat, and you’ll also receive lots of compliments on the elegant pattern and design. I also LOVE that it has an extra spot to keep your spoon! :)

If this pattern isn’t quite your style, Terry has a variety of wonderful patterns to choose from, so make sure you check out the rest of her shop!

And a big, “thank you” goes out to Terry for allowing me to feature one of your amazing products this week! :)

Ashley’s Jewelry Frame

Ashley’s Jewelry Frame {Fan Submission}

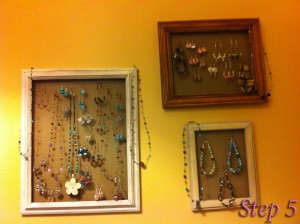
A few weeks ago, I shared an idea for how to store your necklaces (see the post here). Thanks to my friend Ashley, I have another cute idea for storing your jewelry using old picture frames!

{What You’ll Need}

1. Picture Frame(s)
2. Screen
3. Hot Glue Gun
4. Sandpaper (optional)
5. Paint (optional)

{Instructions}

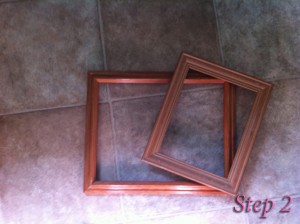
1. Start with some old picture frames {or new ones  if you’d like :) }

2. Remove all the backing.


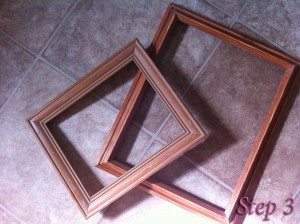
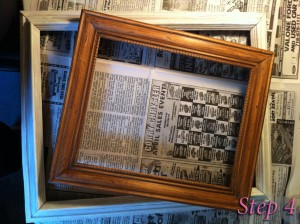
3. Sand the frames to prepare them for painting.

4. Paint the frames in the color(s) of your choice (Ashley chose to use a distressed look when painting her frames).


 5. Hot glue the screen onto the back of the frame and you’re ready to hang your jewelry!

Thanks again to Ashley for submitting this idea, and for letting me use your photos! If you’re interested in purchasing some of Ashley’s jewelry, you can email her at: ash24ot@gmail.com

Also, don’t forget to submit your home décor ideas to info@cherryblossomcharm.com to be featured on my blog! :)


Accessory Storage/Display

Accessory Storage/Display {From The Really Petite Blog}

A few months ago, I started following a blog called “Really Petite” because, for those who don’t know me personally, I’m “really petite”. :) I have always had a difficult time finding professional clothes that fit me, so when I came across Annie’s petite fashion blog through the LOFT Facebook page (my favorite clothing store), I was so excited! Annie is also a petite, and uses her blog to share her outfits, along with where she buys each piece. It’s super helpful to girls like me who have a difficult time finding clothes!

Anyway, by now you’re probably asking yourself why I’ve shared all my fashion woes with you… Well, today I’m sharing one of Annie’s posts. :) No, it’s not about fashion, but it’s a lovely way she uses to organize and display some of her accessories! I loved her creativity, and thought the ideas were so great that I had to share them with you!

Without further ado…

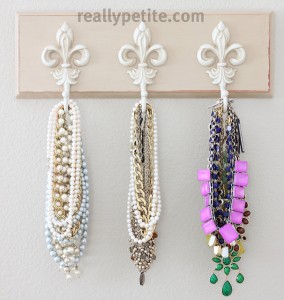
From Annie: “I’ve had this fleur de lis coat hanger (not sure what it’s real purpose is) for years and never really had any use for it until one day I was cleaning out all my jewelry and re-discovered it. It holds the majority of my necklaces so nicely and doesn’t topple over when it gets too heavy like my old necklace trees. I got it at either TJMaxx or Home Goods – can’t remember but it was around $12-$13. I think even a decorative belt holder or coat hanger with hooks would work just as nicely.”

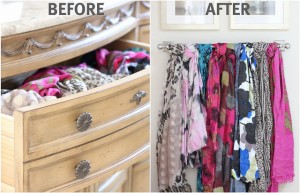
“I have a ton of cute scarfs but rarely wear them because when I’m in a hurry in the morning, I don’t have time to dig in my drawer. I found an extra towel bar and put it inside my walk-in closet and now I can see all my scarfs and it’s easy to decide which one to wear. It’s nice and neat and doesn’t take up much space!”

(Photos By: Really Petite)

Thank you so much to Annie for sharing these wonderful ideas, and for allowing me to share them with my readers! You should definitely go check out her fashion blog and Facebook page. :)

Remember, if you have any of your own home decor ideas and photos you would like to see on my blog, please feel free to submit them to info@cherryblossomcharm.com!

A Rubber Ducky Baby Shower!

{Charmed Event} A Rubber Ducky Baby Shower!

This past weekend, my family held a baby shower for my older sister, Jenny. My mom, and my other sister, Steph, and I all helped to plan the décor/favors for the shower. Jenny wanted lots and lots of rubber ducks, so that’s what we gave her! Everyone loved how it came together, so I thought this would be a great time to share some photos from the shower, and some of our inspiration with you!

{The Invitations}

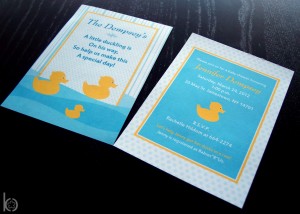
For the invitations, I really wanted to go with a “cute but elegant” look, so I custom designed these invitations for Jenny.

{The Favors}

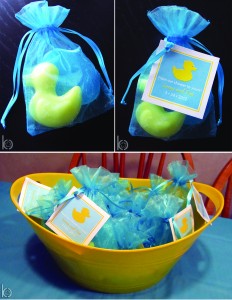
A few months before the shower I was looking up favor ideas for a rubber duck themed shower, and came across some suggestions like bubble bath, and bath soap. I thought these were great ideas to tie in our theme to the favors! My sister, Steph, took it one step further and created two different bath soaps: a yellow duck, and a turquoise bar soap to match the colors of the shower. She even scented them like baby powder! We used favor bags similar (only larger) to the ones found here, and I designed the tags to match the invitations. The turqouise favor bags and bar soap behind the yellow duck helped to give the duck the appearance of being in the water. We found the small, yellow container (I thought it look similar to a tub) at the Dollar Store, and it worked perfectly to hold the favor bags!

{The Food}

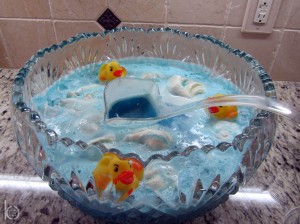
We added a few fun details to the buffet to ensure the food matched the theme of the event. My aunt created the punch by mixing Blue Hawaiian Punch, lemon-lime soda, and vanilla ice cream. My mom found the small ducks that we washed and allowed to float around the punch bowl.

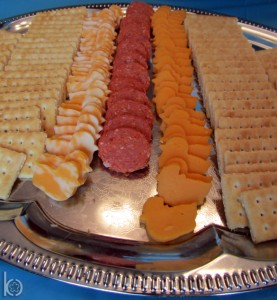
My mom found a small cookie cutter shaped like a duck to cut out all the cheese. A fun way to eat cheese and crackers!

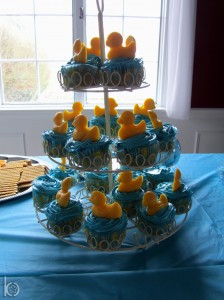
The cupcakes were baked by my mom in duck liners (found at Hobby Lobby), and my sister, Steph, and I frosted them to look like waves. My mom bought the yellow chocolate melts and melted them down in the microwave and put them into a duck mold, then placed them in the fridge to harden. The ducks were placed on top of the frosted cupcakes and put on a cupcake stand.

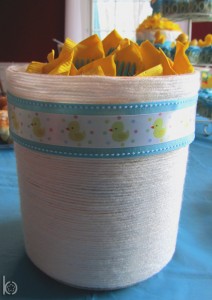
Rather than just putting the silverware out for people to take, I wanted it to have some style so I decorated an empty, plastic pretzel rod container to match the theme. {We used turquoise, plastic silverware wrapped with a yellow napkin. You can’t see it in the picture but I made napkin rings by wrapping ribbon around the rolled napkin and attached the ribbon to itself using a glue dot. I used two different ribbons, a turquoise polka dot, and a duck pattern, and alternated which ribbon I used on for each napkin ring.}

This container had a lot of grooves and places where the plastic stuck out at the top, so this is how I wrapped it:

What you’ll need:
Yarn
Plain Ribbon
Patterned Ribbon (smaller width than the plain ribbon)
Mod Podge
Foam Brush
Hot Glue

  1. Starting about ¾ the way up the container (where the bottom of the ribbon will be), apply a layer of Mod Podge with your foam brush about a 1/2 inch wide all the way around the container (don’t do too much at a time or it will dry before you get there).
  2. Wrap the yarn over the Mod Podge, pressing down and squeezing the rows of yarn together as you go.
  3. Once all the glue has been covered, apply another 1/2 inch wide strip of glue and continue applying the yarn over the glue.
  4. Continue this process until you get to the bottom of the jar, and then cut off the ribbon and tuck the end under a previous row so you can’t see it. (Try to be consistent about where you start and end the yarn on the container so you can keep the ends on the back)
  5. Using your thicker, plain ribbon, measure the jar and cut the ribbon so you have about an inch more than you’ll need.
  6. Remembering where the back of your jar is, put a dab of hot glue on the container, and press the end of the ribbon down until it dries.
  7. Wrap the ribbon around the jar and place another dab of hot glue on the ribbon that is already attached to the jar.
  8. Press down the other end of the ribbon until it dries. (You may need to lift the ribbon in a few places around the jar and add some extra hot glue so it doesn’t sag)
  9. Repeat this process with your thinner more decorative ribbon, centering it on the plain ribbon.
  10. Since the top of my jar had so many grooves, I had to apply the ribbon differently from how I did the bottom, wrapping and placing a dab of hot glue every few inches until the top was covered. If you have a more normal container that is flat, you can apply your yarn to the top in the same way you did the bottom.

{The Games}

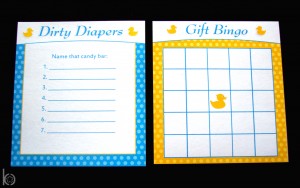
Two of the games we played at the shower required guests to write, so I designed custom duck cards to match the rest of the paper products at the event.

P.S. If you’ve never played the “Dirty Diaper” Game (aka “Name That Candy Bar”), you have to consider planning it for your next baby shower. It’s a great, fun {and somewhat disgusting} baby shower game. :)

{The Décor}

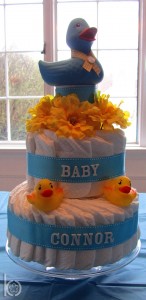
After debating about the centerpiece for awhile, my mom came across the idea of doing a diaper cake.  Like everything else at the shower, we wanted to keep it cute but elegant at the same time, so we decided to match the theme of the shower, rather than using lots of pacifiers, rattles, etc. My mom and I created the diaper cake together, and we were so thrilled with how it turned out!

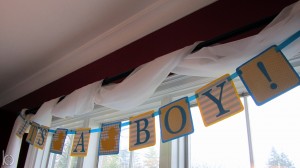
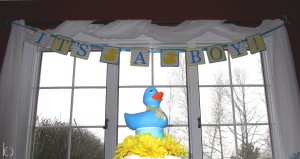
I made the banner by creating a template for all the shapes and letters on my computer, printing and cutting out each template, tracing them onto scrapbook paper, and cutting them out. It took a long time to do all that cutting, but it was definitely worth it in the end!

Have an event you’d like us to feature on our blog? Feel free to submit photos and information to info@cherryblossomcharm.com :)